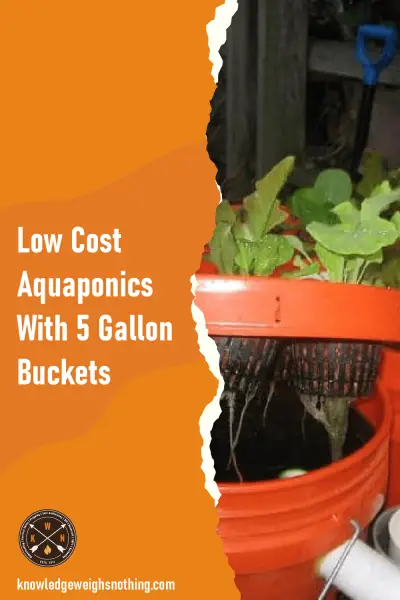
Knowledge Weighs Nothing

Log Home Plans: 40 Totally Free DIY Log Cabin Floor Plans

Log home

A log cabin or log home is not only a versatile, endearing and cost effective living solution, it is also a great way of creating your very own retreat (especially with these free log home plans!) that you can pick up and place in a wide range of spaces, providing they have the capacity to accommodate your new it of course! See down below for the free log cabin floor plans.

Utilising traditional building methods, the art of constructing your very own DIY log cabin requires implementing unique, artisan skills that call upon a whole host of natural materials.

But best of all, log cabins are relatively simple to construct yourself, providing you have the appropriate tools, quality materials, manpower and of course, knowledge and some DIY log home plans (which we can help to provide).  Trust us, there’s no better way to embrace sustainable living!

When constructing a log home from scratch, it’s important that you follow (and stick to) step-by-step instructions that detail and outline how to create a structurally sound DIY cabin, allowing you to create your perfect log home that is able to withstand the harshest environments. After all, it’s paramount that your DIY log cabin is safe, sturdy and resistant.

So here, we’ve compiled a list of some of the best DIY log cabin plans available online, demonstrating every step of the production process, from start to finish. Outlining clear and concise construction methods, the plans will allow you to create a durable, rigid and accessible log cabin that is able to accommodate your exact requirements.

But, before you go any further, it’s important that you understand exactly what you want to get out of your DIY cabin. Log cabins, like any structural living space, come in all shapes and sizes. From intimate spaces through to cabins that are able to accommodate large groups, there are lots of options to choose from! Oh, and you’ll be amazed at the wealth of facilities, home comforts and unique features available.

Of course, this also means that when it comes to building your DIY cabin, difficulty levels vary and, although many are relatively simple to construct, others are far more complex requiring specialist skills and expertise.

So ask yourself, what will you use your log cabin it for?  How often do you plan to use it? What type of environment will your log cabin call home?  All of these factors will have an impact on your choice of design. After all, if you only plan to use your log cabin a few times a year, a more basic design may suit your needs better as opposed to a cabin that you plan to use every weekend, or every day!

Once you’ve made up your mind, the next step is to get building. Here are some of the best DIY log home plans that are available online, and best of all, they’re all free! So why pay someone else to build your log cabin when you can do it yourself?

Log cabin build plans

Two bedroom contemporary log home with loft and basement

log home floor plans

If you’re looking to create a spacious, family log cabin, then this two-floor two bedroom contemporary cabin, with loft space and basement, then these are the log home plans you’ve been looking for.

Offering ample storage, living and practical space, this accommodating cabin features a master bedroom, and an additional bedroom space that lends itself perfectly to being used a guest bedroom or a space for your little one.

Also featuring all the facilities that you would expect to find in a liveable home, this plan also features adequate kitchen, dining, laundry and living room space – making it ideal for entertaining or kicking back and relaxing.

But this design’s standout features have to be its loft space and outdoor porch area. The loft space offers more than enough room to store away sports equipment, your seasonal clothing and anything else that can leave your home feeling cluttered and unorganised. The outdoor porch area is also a great addition to this cabin, providing the perfect area to soak up the summer sunshine or snuggle around a roaring fire during the colder months.

You can download these free log floor plans here:  http://www.todaysplans.net/CabinsAndSheds-Cabin1.pdf

One bedroom concrete block cabin loft and porch

I know – these are supposed to be log cabin plans, but this is concrete block cabin is another option to add to the mix.

Although this attractive one bedroom concrete block cabin loft and porch only offers one bedroom, it is perfectly equipped to accommodate larger family gatherings.

Offering a large family room, bathroom and dinette, this log cabin is great for accommodating short breaks and longer stays, it would also make a great family home for couples.

The addition of the covered porch also adds another dimension to this cabin, providing the ideal spot to kick back and relax season to season. You also don’t have to worry about storage, as it comes complete with a spacious loft space that will easily accommodate mass storage.

You can download the free cabin floor plans here: http://www.todaysplans.net/CabinsAndSheds-Cabin3.pdf

Log cabin plans for an“A” Frame cabin

 This two-story “A” frame cabin house comes complete with two spacious bedrooms, a large living/dining room, a balcony and porch, as well as an accommodating kitchen and bathroom.

Offering a distinct rustic feel, this charming build is bursting with character, and will enable you to create a space that is finished to highest standards.  Featuring durable wood flooring and a sturdy ladder that takes you up to the second floor, the frame of this log cabin is typical of many traditional structures.

You can download the free log home plans for this cabin here: http://www.lsuagcenter.com/NR/rdonlyres/AFC60E41-A8F6-4C45-ABE3-5D34AD0679B9/15503/24AFrameCabin.pdf

1 Bedroom Guest House

Guesthouse log cabin plans

A log cabin lends itself perfectly to creating a guesthouse that is inviting, comfortable and bursting with character, especially if you are pushed for space in your home. Obviously, if you entertain guests on a regular basis, a guesthouse also offers far more privacy and space than guest bedrooms inside your home.

This spacious 1 bedroom guesthouse cabin will allow you to build a practical living solution that will make the ideal guesthouse.

Boasting a large spacious bedroom, a sizable main living area and bathroom, this plan will help you to build a practical living solution that is cost effective, durable and resilient. It can also easily be integrated into your property’s outdoor land. In fact many people position their guest cabins in their back yard! Of course, this set up is also perfect for other purposes, such as a cool hangout den for teenagers or a tranquil retreat for you to escape the chaos of the house from time to time.

Before embarking on any build, it’s also recommended to check your local building codes criteria!

You can download the free log cabin floor plans for this guest house here: http://www.ag.ndsu.edu/aben-plans/5185.pdf

Pole Cabin  w/Plenum Heating Log Home Plans

This 24/32, two-bedroom wood frame cabin is plenum heated, making it perfect for building a comfortable, warm family home.

Attractive inside and out, this inviting cabin boasts all the everyday facilities that you would expect to find in your home.

Featuring two spacious bedroom areas, which could easily accommodate two single beds in each room, a simple yet functional bathroom suite, as well as a large kitchen/diner area, this plenum heated cabin is great for weekend and full-time living.

You can download the free log home floor plans here to create this build yourself: http://www.lsuagcenter.com/NR/rdonlyres/BCB7C088-B906-4FF0-BA7A-3E05753AC194/15591/5997PoleCabinWPlenumHeating.pdf

Tourist Log Cabin Floor Plans

Log cabin living is extremely appealing to tourists, as it not only gives them the opportunity to experience a new way of living, in new and exciting surroundings, it also offers a comfortable retreat for them to relax and unwind.

In recent years, tourist cabins have continued to increase in popularity and, in response to growing demands, they have become more accommodating and functional than ever before.

This open porch tourist cabin is small yet highly spacious, making it the ideal, intimate retreat for couples, or even solo visitors looking for a comfortable space to collect their thoughts.

These design plans show an open plan space that features ample room for a bed, bathroom and closet space. However, one of the main advantages of this particular cabin is that it has its very own large porch area, making it ideal for those who enjoy the outdoors.

You can download the free log cabin floor plans for this cabin here: http://www.ag.ndsu.edu/aben-plans/5184.pdf.

5 Room Log Cabin – Log Home Plans

5 bedroom log cabin floor plans

Perfect for large families or group vacations, this spacious 5 room log cabin boasts 5 large bedroom areas that are all super comfortable and extremely spacious.

Bursting with the character you would expect to find in a traditional log cabin, this log cabin design features two bathrooms, a large kitchen and dining area, as well as a main living area with an open log fire – another dimension that creates a striking focal point.

Other interesting design elements include a cathedral ceiling over the living room, a large walk in closet, and an inviting porch area.

You can download the free log home plans for this cabin here: http://www.ag.ndsu.edu/aben-plans/5506.pdf

Buffalo Run Series – Cabin Floor Plans

This impressive family orientated cabin offers an inviting, functional and comfortable living solution that is perfect for everyday family living.

Boasting luxuries such as a large master suite, a huge kitchen and dining area, as well as spacious loft, this 3 bedroom log cabin features a total living area of 5714sq.ft – with the main living area being 3161 sq-ft and the loft and storage areas being 2553 sq.ft.

You can view/save/download the log home floor plans here: http://whispercreekloghomes.com/wp-content/uploads/2013/07/buffalorun_01.pdf

16 x 20 Cabin with Bunk Beds

This design features a 16×20 cabin that also accommodates 2 tier bunk beds.

Smaller than the other designs, this compact cabin provides ample home comforts, that make it a safe and reliable cabin, perfect for accommodating guests – particularly children who love the idea of sleeping in bunk beds!

Featuring a stove, wood flooring throughout, and a spacious living area, this cabin is great for overnight stays or short visits.

You can get the log cabin floor plans here: http://www.lsuagcenter.com/NR/rdonlyres/1741C101-A6C6-4C05-BF47-7B96E4B0F985/15610/600416X20Cabin.pdf

2 Bedroom, 1 Storey Log Home with Open Porch

2 bedroom log cabin plans

This perfect family living solution features 2 large, spacious bedrooms with large closets, an inviting open porch and plenty of character.

With its 1 story design, this comfortable log cabin will open your eyes to compact yet spacious design that will give you everything that you need in a family home and more.

Boasting ample space to entertain and relax with family and friends, this endearing log cabin even features a large outdoor porch that is great for sitting out and relaxing on, whatever the season. Many people integrate a comfortable outdoor seating area into their design plans when building this log cabin, as a porch is often considered as an outdoor living extension of the home.

You can download or view these log home floor plans here: http://www.ag.ndsu.edu/aben-plans/5507.pdf

Community Log Cabin Plans

This community log cabin lend is perfect for hosting large group gatherings, activities and events.

Its huge assembly room is one of its main standout features, as it provides the perfect opportunity to hold large groups in one space – great if you run community focused events – its versatility shouldn’t be underestimated!

The community log cabin also features integrated storage space that is perfect for storing sports and activity equipment, props, and arts and crafts equipment. However, if you do not require this, the storage can also be taken down.

Other features of this community log cabin include a large kitchen area, bathroom, and even an office space – providing the ideal base to work from. But that’s not all, this cabin even accommodates a dressing room and cloak room, so it’s great for hosting theatre performances or assemblies.

You can view and download the log cabin floor plans for this community cabin here: http://www.ag.ndsu.edu/aben-plans/5602.pdf

30+ Different DIY Cabin Plans

Let’s get one thing out of the way quickly – the cabin in the photo above is not in the plans. It is the only nice looking newly built cabin, that I had permission to use! That said, don’t be put off for one moment as below you’ll be able to find 30 different sets of cabin build plans…

The list of plans below includes everything from small single room cabins, right through to full sized family home cabins. There’s also everything in between. Given that you can pay $100s for cabin build plans, this is a pretty cool resource. My recommendation is – if you see a cabin you like, download the build plans right away whilst they are free. It’s better to download the plans now, but never use them, rather than wish you’d downloaded them and not being able to find them in a year or so. Get them here: FREE: 30 Different Sets Of Cabin Build Plans

(Image from: Max Wolfe)

How To Build A 12×20 Foot Cabin For $2000

DIY log cabin built for $2000

Want to build a low cost, quality cabin that would make accommodation for guests? Got a bit of land for your secret bug-out location which needs an affordable cabin? Answer yes to either of these questions, then you’ve come to the right place!

Below is an excellent step-by-step tutorial showing how to build a 12×20 foot wood cabin for $2200. It is a full build tutorial with details, measurements, and materials. The cabin has a door and window at the front and double windows at the rear. The cabin is also wired for electricity with lighting and power points. Find out more: How To Build A 12×20 Foot Cabin For $2000

(Photo from: coolbeansbaby68 via Instrutcables)

Traditional Log Cabin Built For Less Than $500

$500 for a quality, traditional wood cabin, that’s crazy talk, right? Well, that is what I thought until I watched the video above which tells the story about this DIY log cabin and how it was built…

It really does emphasise the power of community, and roping in friends and family to help out on a project. Sure the cabin took eight months to build using free labour, but the whole project cost just $500. Seems an awesome trade-off to me. Watch the video and see what you think.

(Image from: OutsideFun1)

How To Build A House With No House Payments Or Utility Bills

No house payments and no utility bills, that’s the dream, right? Well, maybe that dream isn’t as far-fetched as you might think!

The video above shows how one guy built a cabin for $2000, drilled his own well and installed a solar power system which provides for all the electricity needs which cost an additional $3000. One thing to note is that the land he has, which is a little less than an acre, was gifted to him, although he does go on to say he has purchased similar plots of land for around $400. Finally, the last thing to note is that this video was uploaded in 2009, but even if you increase the costs in-line with today’s costs, this really is a great demonstration of what can be done with a minimal budget and a bit of hard work.

How To Build An Earthbag Roundhouse

earthbag house

A while back I did a post: How to Build an Earthbag Dome this was a windowless dome building which would make a great root cellar or storage shed. Today I am sharing a tutorial to build an earthbag roundhouse, complete with windows and doors.

This is very cheap and easy way to build a one room dwelling.  The cost per sq foot of living space is just $11.50; anyone in the construction business knows that is crazy cheap….

The finished house looks beautiful, inside and out. The outside is plastered and whitewashed and it has a thatched roof, have a look and see how nice it looks. I can’t see why you couldn’t build several of these alongside each other to create a larger multi-room home. Check out the photo tutorial: How To Build An Earthbag Roundhouse

(Photo from: Owen Geiger via Instructables)

How To Build A Dirt Cheap House

earthbag round house

If you have always dreamt of building your own house or bug-out house/retreat, but you have been put off by the high build costs etc, this could be right up your street…

The post below explains that by using, and knowing how to build with, locally available natural materials such as earth, small diameter wood, and straw, you can keep expenses to an absolute minimum. In fact, build costs can be as low as $10/sq. ft. With build costs this low, it opens the doors to the possibility of many more of us being able to build our own houses. Find out more: How To Build A Dirt Cheap House

(Photo from: Owen Geiger via Instructables)

Amazing Forest Home Built In 6 Weeks For $4,000

forest log cabin

This might just be my favourite cabin ever! Can you imagine if this was your weekend and holiday retreat? It would be amazing, I feel less stressed just looking at the photo, let alone spending time there…

The cabin is absolutely beautiful inside and out (check out the sink!), and the crazy thing is that it was built in just six weeks for a budget of $4000. I wish I could share all the photos of the cabin here, so you can see how beautiful the inside of the cabin is, but I can’t. But if you click through to ‘Tree Hugger’ via the link below you can check out all of the awesome photos there. I love the hillside, treehouse style rear porch! See them here: Amazing Forest Home Built In 6 Weeks For $4,000

(Photo by: Herrle Custom Carpentry via Treehugger)

Filed Under: A.K.W.N, DIY, Homesteading, Self-Sufficiency

How To Get Used/Working Solar Panels For FREE

SOLAR PANELS For FREE

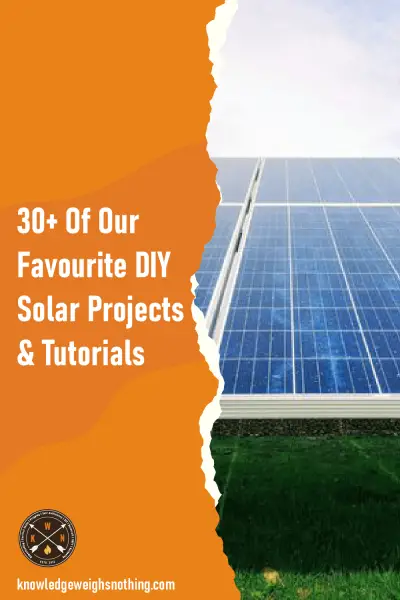
That’s right, there is a way you can get solar panels for free! I know
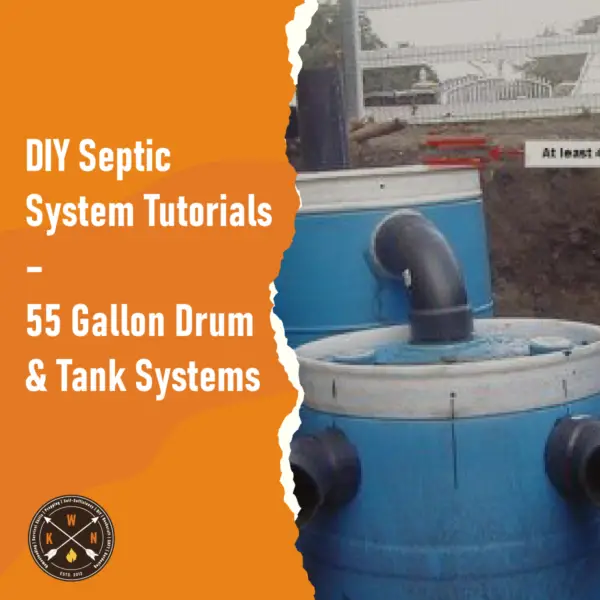
 someone who did it and so can you. Here’s how it’s done…

Solar panels are used everywhere these days. They are often used by construction crews and traffic systems (signs, cameras & emergency signal lighting etc) and these are where we are going to focus because they quite often have contracts with the solar panel providers. Whenever a solar panel becomes cracked or damaged, they are replaced under contract, even when they are still serviceable.

The solar panel provider ends up with a whole load of damaged but working solar panels. They can’t sell them so they usually have to pay to have them disposed of. What you need to do is find the contact details for the solar panel providers and give them a call to see if they have any damaged but functioning solar panels you can take off their hands.

The person I know who did this got around $800 of working solar panels for free, just for a bit of detective work. He saw a solar panel on a road sign and noticed the sign had a sticker with a phone number on it to report a problem. He simply phoned the number and asked for the solar panel provider’s details and gave them a call. A few phone calls later and a trip to their facility and he had a load of free solar panels.

UPDATE: We have several solar farms locally, that generate and sell electricity as a business. I reached out to two of them. Both had old, in some cases slightly damaged solar panels, which still functioned. Both said I could have some of these panels for zero cost. In fact, one of the solar farms offered to deliver some for a small fee.

I enquired about the efficiency of these panels. It was explained that these old or slightly damaged panels were not as efficient as new solar panels (hence why they were replaced). With a solar farm, everything is about efficiency at generating electricity. They are a business. That said, for home use (and at zero cost) these panels have years of life left in them. Additionally, if you have space you can simply have more panels, to make up for any lower efficiency with these older solar panels. 

I guess you could also try researching and directly contacting solar panel manufacturers too. They must get loads of panels that are damaged or defective that still work but can’t be sold. Even solar panel stores must get loads of damaged but working solar panels returned, or have panels that get damaged in storage etc. No one wants to pay to have to dispose of damaged goods.  Take advantage of this and you could get free or heavily discounted stuff that works just fine.

Just a little thinking outside the box can save you a huge amount of money. Give it a try, all you have to waste is a little time and a phone call.

  • Related post: How To Build A Water Wheel Generator

Filed Under: A.K.W.N, General, General Prepping, Homesteading, Self-Sufficiency

Over 40 Of Our Favourite DIY Solar Projects & Tutorials

40+ Of Our Favourite DIY Solar Projects & Tutorials All Here In One Place
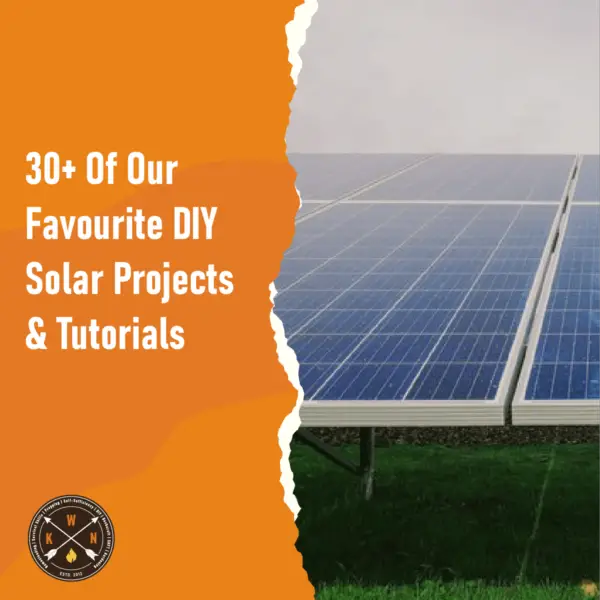
Over the years we have featured a whole load of awesome DIY solar projects for you guys to try building for yourselves. This fairly big post is a round-up of some of the shorter DIY solar posts we have done. I have rounded them up here, in one place, to make them easier to find. The DIY solar projects below are in no particular order, so make sure you have a scan through all of them! You can use the ‘table of contents’ below, to jump to any specific project.

DIY Beautiful Solar Light Pathway

DIY solar path lights

How awesome does that look? This solar light pathway is made with glass blocks and solar-powered LED lights. In the tutorial below, most of the items used were purchased, but I think you could pick up almost everything required for free if you ask around…

For example, when we moved into our house, the previous owner had left 15 of those glass blocks in the garage. They knocked around for a while and then I ended up just giving them away. Also if you didn’t want the different colours, you could pick up some free unwanted solar garden lights, and utilize the solar panel and LED in the glass blocks; this method would also cut down on any wiring. If you want to give this a go, get on Freecycle (or similar) and see what you can acquire for free. Tutorial: DIY Beautiful Solar Light Pathway.

Build A Solar Panel From A Picture Frame & Some Solar Garden Lights

DIY picture frame solar panel

If you have been following K.W.N for a while, you’ll know we love cheap recycling/re-purposing projects. Today we have a nice little solar project to build a cheap solar panel from a picture frame and some old garden solar lights…

This would be a cheap project even if you were purchasing the solar garden lights specifically to build this solar panel.  You can pick them up for a dollar or two and you could save the batteries and LEDs for other projects. It’s just not necessary to buy new lights though. Almost everyone has some of these solar lights laying around unused at home. The cheap batteries fail and then they get discarded in the shed. Ask around, I am sure you’ll have no problem getting hold of some for free! Once you have enough solar garden lights, check the tutorial and get building your own cheap DIY solar panel.

How To Get Cheap Solar Power: 14 DIY Solar Projects

Homemade solar projects

For most people, the dream of living off-the-grid can only be accomplished by utilizing solar power, but this doesn’t always have to mean purchasing $10,000 solar system to power your home.  Solar power has never been this cheap! Here are 14 DIY solar tutorials to get you generating free electricity and cooking for FREE, using just the power of the sun.

There are cheap DIY solar projects here ranging from simple solar food dehydrators and cookers, through to small DIY solar generators and even a fully DIY home-built solar system…

DIY Home Built Solar Power System

DIY solar power system

If you truly want to live off-the-grid or insulate yourself against rising energy prices, you have to embrace and utilize solar power (unless you have running water source, in which case you could utilize hydropower instead).

The problem is that getting a professional company to kit out and set you up with a solar power system can be very expensive, but if you have sound DIY skills, with a bit of planning and research, you can set up your own DIY home solar power system. Check out the link here to see how this can be done.


How To Make A Better Solar Dehydrator

Homemade solar dehydrator

We did a post ages back about how to make a different solar dehydrator,  but that dehydrator was a completely different design…

Personally I think this solar dehydrator is a more effective design.  The whole thing seems more effective and simple and this applies to how it’s built and how it functions. If I had to choose between the two solar dehydrator designs, I would choose to build this one. Check out the great photo tutorial (including materials list) from ’10 Degrees Above’.


Make A Cardboard And Duct Tape Solar Oven

DIY solar oven

Now I’ll admit – until I started reading up on them a bit more – I thought solar ovens were a bit of a gimmick, you know, something to do with the kids, or just a fun project that isn’t that practical… How wrong I was! On a sunny day these babies rock, I have seen them cooking all manner of foods, I have even seen one bake a loaf of bread!

The tutorial below shows have to make a super quick, super simple solar oven from just a cardboard box, aluminium foil and some duct tape, and even this solar oven managed to get to a temperature of 280 degrees! This is a cardboard box and aluminium foil solar oven; imagine how much a solar oven would be if it was made from higher quality materials! I have read posts saying that 450 degrees is easily achievable. I’ll search out a higher quality, more permanent solar cooking tutorial, but in the meantime, have a go making this cardboard box solar oven and see how it goes. Tutorial: Make A Cardboard And Duct Tape Solar Oven.

How To Build A Solar Food Dehydrator

DIY solar dehydrator
Being able to eat and enjoy the fresh fruit and vegetables your grow is one of the best things about becoming more self-sufficient. However, in many places the growing season is short.  You end up with an abundance of crops in the summer and fall, but hardly any through the winter.

The main solution to this problem is to preserve your fruit and vegetables so you can enjoy them through the winter months. In my opinion, one of the best ways to do this is to dehydrate food.  You can purchase electric dehydrators, but why spend money on an electric dehydrator and continue spending money on the electricity it uses, when you can make a solar dehydrator pretty cheaply that costs nothing to run.

If you’re interested in building your own solar dehydrator, check out the video below. Also, check out this link for more information on building a solar dehydrator.

How To Build An Awesome Solar Oven (Bakes Bread & Cooks Whole Chicken!)

Solar oven project

A while back we did a post showing how to build a very cheap and easy solar oven from a cardboard box. Today we are featuring its big brother (built by the same person), which is made from wood, fully insulated and even has a sun finding a pivoting base, making it easy to focus the oven at the sun.

People dismiss solar ovens as a gimmick, I think this is a mistake, sure, they are useless on a cloudy day, but it is worth building a solar oven because when the sun is shining, you can cook all day long for free! This particular oven can maintain a 300-degree temperature on a sunny day, and it is often used to bake bread and cook a whole chicken.


DIY Solar USB Charger – Upcycle An Old Altoid Tin

DIY solar USB charger

If you are a fan of DIY and LOVE solar-powered stuff, this is your next project. This Altoid tin solar USB charger will power your iPod or phone where ever you are.

Why spend 50 bucks on one from online when you can make one for a lot cheaper and a lot cooler looking. You can pop the solar panel away and no one will ever know what is inside. Tutorial: DIY Solar USB Charger – Upcycle An Old Altoid Tin

How To Build A Solar-Powered Still To Purify Any Water Source

Build a solar still

The great thing about using a still, or in this case, a solar still to purify water is that any water source can be used, even dirty unfiltered water and sea water!

Boiling water is the most common way to purify water to make it safer to drink. The problem is that boiling dirty water with debris in isn’t very effective as even after the water is boiled, there is still potentially dangerous sediment and debris in the water. It is the same with salt water, boiling won’t make it drinkable… Purifying water with any still and in this case, a solar still, will effectively purify both dirty unfiltered water and salt water.  This is because in both cases, the sediment and salt etc, don’t evaporate, so they are left behind to be discarded. To find out more about building a solar still, check out the great post from ‘Off The Grid News’.


DIY Solar Water Heater from Stock Tank

Solar water heater tutorial

Are you looking to get off the grid to heat your water? Batch heaters have long been known as the best choice in warm climates or for seasonal use in colder areas, and recent work with improved materials and designs suggests they may also be the best choice even in colder areas.

You could find a lot of the parts and materials needed to make this on craigslist to make this build even cheaper. Tutorial: DIY Solar Water Heater from Stock Tank

DIY Miniature Soda Can Solar Heater

Soda can solar heater tutorial
A few weeks back I did a really popular post: Cheap To Build Soda-Can Solar Space Heating Panels.

This is very similar, although on a much smaller scale. This soda can solar heater from Primed Preppers is designed to fit on a windowsill.  It is not going to completely heat your home, but every little bit helps.

I think this would be a nice fun project to do either with the kids or perhaps as a proof of concept/trial, before taking things large scale like our previous post on a soda can solar heaters.

How To Build Your Own Solar Thermal Panel For Around $5

Solar thermal water heater tutorial
I did a post a few days back about solar power for your home. Some folks on the Facebook page pointed out that the options featured were expensive and out of the reach of many people.

Today I am going to focus on budget solar power and when I say budget, I mean less than $5. That’s right, for less than $5 you can build a solar thermal panel, which will heat water to a temperature that scalds.

This option is small-scale and it is built around a reclaimed heat dispersal system from an old refrigerator (which you can get with the gas removed from your local dump). It has no pump as it is gravity fed and it requires no electricity to work. Just put it in the sun, turn on the water feed and you will get a slow but constant supply of very hot water.

Now, this is all small-scale, but I see no reason why several of these panels could not be used together in some way, to meet a family’s entire hot water needs. The idea of using reclaimed heat dispersal systems from old refrigerators is genius and I definitely think there is enough here to run with and create something more large-scale.

Head over to The Sietch and check out their tutorial complete with lots of photos to help you along the way.

DIY Solar Panel That Follows The Sun

DIY sun tracking solar panel tutorial

Solar power is a great way to get off the grid or at least power some household items to be more self-sufficient. The only problem with this is you have to have the solar panels pointing in the direction where the sun the most.

This relatively low cost and straightforward to build project actually allows your panel to follow the sun so you have more hours of sun on your panel, thus, giving you more power, apparently, between 30 and 50% more power! See the full instructable here.

How To Build Your Own Solar Thermal (Free hot water!)

Simple DIY solar thermal water heater
This is a super simple, super effective, budget DIY solar thermal for hot water. It is so effective it can heat water to a temperature that scalds… The system can heat five gallons of water and due to the high temperature of the water, this is more than enough for a quick shower as you will need to add more cold water to adjust the temperature. The whole system costs around $30 to build.

To be fair, the person who built this solar thermal is based in Hawaii, but it has proven very effective there, so there is no reason this should not be just as effective for anyone else living in similar warm regions. It could also be utilized in cooler climates, but its performance is very much determined by the heat and sun. Even so, it could still be a worthwhile project, even if it is only effective seasonally.

Head over to The Sietch and check out their tutorial complete with lots of photos to help you along the way.

DIY Portable Solar Water Heater

Portable solar water heater

I go camping pretty much every few months and I have always wondered if there was a way of getting hot water without boiling it over a fire! I found a DIY portable water heater that you can make for around $10 and can be folded and carried in a backpack, suitcase, car or boat!

This could be used to have a shower or to wash. Even better, if you were bugging out, this would give a much needed moral boost to get you going again. See how to make it.

DIY Solar Powered Radio (or other AA powered devices) For $3

DIY solar powered radio tutorial
This great tutorial shows you how to adapt a 2/3 AA cell-powered radio to be solar-powered, by using the small solar panel from one of those cheap solar garden lights.

Sure, you can go out and purchase a new solar-powered radio, but they cost a lot more, and this way you can convert an existing radio you have.  If you also have an old solar garden light as well, this project will cost next to nothing to complete. Once completed you can put rechargeable AA batteries in your radio and they will be recharged by the solar panel when it is left in bright light.

I am not an expert, so someone please tell me if I am wrong, but I can’t see any reason why you couldn’t do the same thing with any 2/3 AA cell powered device.  The principle would remain the same…

If you want to give it a go, head over to Got Wind and check out the tutorial.

Make A Solar Scorcher (Fresnel Lens) Frame

How to build the Solar Scorcher

The Solar Scorcher in action, burning and melting stuff…


This DIY solar scorcher (Fresnel Lens) is so powerful that it produces a 2,000-degree ray of heat, that instantly sets wood alight. With a focused beam, it can also melt sheet metal!

It could be used for cooking boiling water etc and I am sure it has some other genuine uses (fire starting and melting stuff etc), but I am mostly just featuring it as it is pretty cool and it seriously demonstrates how the power of the sun can be harnessed into something that’s crazy powerful. This DIY project was made with the panel out of an old TV and some low-cost wood; the whole thing cost less than $8 to build.

Build A DIY Solar USB Phone Charger For $5

DIY USB solar charger tutorial

We have featured several DIY solar chargers in the past, some large scale with others being small USB chargers like this one. We featured a DIY USB charger a while back, but the cost came in a bit higher than this charger, due to the fact that that solar charger was effectively a solar battery charger which could then charge mobile USB devices via the power stored in the rechargeable batteries.

This solar charger doesn’t have a battery pack, it charges the battery in your USB device directly.  This brings the cost down as you don’t need to purchase some rechargeable batteries to use for the project. It also means you never have to worry about the batteries failing over time (because there are none!) AND the solar charger is lighter/smaller and way more portable.  It could fit in your pocket. Check out the tutorial.


Make A Cheap Solar Charger From 2 Garden Solar Lights

USB solar charger from garden lights

I think almost all of us have some of those cheap garden solar lights, with many of those lights being broken/unused. If they are broken, see our previous post: DIY Quick Fix For Solar Lights.

If you do have some old unused garden solar lights, why not put them to good use and build this simple solar charger, which uses the solar panels from two garden lights? This DIY charger also has an LED light added for extra functionality. Once built this solar charger should be able to charge/power any small USB device. Tutorial: Make A Cheap Solar Charger From 2 Garden Solar Lights

Easy Solar Panel Or Cooker Sun Tracker Made From A Clock

DIY sun tracking solar panel

So we have posted before about DIY solar panels that track the sun for maximum performance, see: DIY Solar Panel That Follows The Sun. The problem is that was a fairly technical DIY build. This solar tracker is much, much simpler though as it basically involves hacking a large clock to provide the mechanism to track the sun. Once built you just set the clock to the sun and it will then track the sun as the clock turns. Seriously, I don’t think you will find a simper or easier to build solar tracker.

This clock solar tracker could be used with a solar oven or a solar panel. Using a solar tracker should increase performance by 30-50% Vs a static solar panel. Check out the build tutorial.


How To Build A DIY Portable Solar Generator

DIY solar generator tutorial

First I should clarify – there are solar panels, solar chargers and solar generators. We have featured several tutorials showing how to build cheap solar chargers. These are simple to build as they are basically just a solar panel that produces electricity and charges when the sun is out, but when the sun goes in, it does nothing. This tutorial is to build a simple weatherproof solar generator – when the sun is shining the panel produces electricity AND then charges (and tops up) an internal battery so you can store the electricity to use later. To be fully weatherproof I would probably make a little cover to go over the external socket, just to keep it dry.

A solar generator like this would be awesome for camping, fishing and emergency preparedness etc. With it you can power lights and other small devices. Check out the full build tutorial here.


DIY Solar Powered Evaporative Cooler (Portable!)

DIY swamp cooler tutorial
In arid areas of low humidity (desert/ southwest US etc) an evaporation cooler or swamp cooler can reduce the temperature of a room by 20-30 degrees. In many cases, they are even more effective than traditional air conditioning. Evaporation coolers are also very low-tech and cheap and easy to build and run. In fact, the DIY evaporation cooler in the tutorial below is run via solar power.

DIY evaporation coolers provide true off-the-grid cooling for arid areas. The fact most arid areas have constant sun easily allows these cooler to run via solar power. If you hook in a battery to charge in the solar system, you’ll be able to run the cooler throughout the night too. A great option for RVs, trailers/caravans and cabins. Check out the DIY build tutorial.


How To Make A DIY Solar Furnace For Under $50

Free heating for your home, that’s the dream… Unfortunately, short of owning your own woods with a free supply of wood, heating your home entirely for free is probably going to remain a dream. However, there are loads of DIY heating and insulating projects you can undertake that can dramatically cut your heating costs. See Cheap DIY Energy-Saving Thermal Curtains, Endless Hot Water Without Electricity, DIY Bubble Wrap Window Insulation and 5 Ways To Heat Your Home For Free.

The video above shows how to make a simple solar furnace for around $50. It’s not going to entirely heat your home, but every little bit helps and even if it allows you to turn the thermostat down by one degree, that will save you a load of money over the winter.

(Image from: thegulley.com )

Filed Under: A.K.W.N, DIY, Self-Sufficiency

The Rocket Mass Heater: Everything You Need to Know

DIY rocket mass heaters

Looking for the most efficient way of heating your home? Perhaps you’ve heard all about rocket mass heaters and just how clean they are? Whatever the reason, this guide takes a closer look at these heaters, explains how to build them, and covers all of their benefits (of which there are many!).

Wait A Minute… Just What Are Rocket Mass Heaters?

You’re likely here because you know all about rocket stove mass heaters and the benefits that they provide. However, for those who may be less than completely up on everything that these handy heaters can offer, here’s a quick summary.

Rocket mass heaters can:

  • Heat up your home with 80% to 90% less wood than is required with a traditional fire or log burning stove.
  • Exhausted output is practically all steam and CO2 (this is minus a little smoke at the beginning).
  • Heat from a single rocket mass fire can burn and heat your home for days on end.
  • A rocket stove mass heater can be easily built within the space of one or two days (less if you have a helping hand from friends or family).
  • When being particularly careful, you can build a rocket mass heater for under $20!

Rocket Mass Heaters… What Are People Saying?

 Rocket stove mass heaters have great reputation amongst the survivalists and off the grid living crowd. Here are some of the most common comments that you’ve likely heard:

“I burn nothing but dead branches, and the heating within my home has never been warmer”.

“They burn cleaner than any other form of heating… and are a lot more efficient to boot”.

“I’m a city dweller who uses rocket mass heating to cut down my bills”.

 So, now that we know that these really are the most efficient forms of heating on the planet, let’s get down to the nitty gritty of how they work, and what you’ll need to build one.

Example of a rocket mass heaterRustic rocket mass heater used to heat a permanent tipi

The science behind a rocket mass heater

OK, so you may be wondering just how rocket stove mass heaters work, particularly as they seem to buck all the trends and go against all of the fire guidance that you’ve ever been taught (e.g. they output no smoke and the wood burns sideways).

What’s more, with a 75% efficiency rate you’d think that the most wood you could possibly save on would be the remaining 25%, right? And to top it all off, just how on earth can such a contraption not emit a plume of smok,e given that there’s a gaping big hole right in the top of it?

Well many of these questions are answered as soon as you see a rocket mass heater in action, here’s a quick overview…

How rocket mass heaters work – In detail

With the sticks within a rocket mass heater stood straight up, it’s only the bottom ends that burn and, what’s more, as they are at a junction within the heater, they burn sideways. The heat within is also insulated, which is why rocket mass heaters get so hot. As this naturally has a strong convective current, encouraging hot gasses to hit the barrel where they then expel much of their heat, consequentially cooling the gasses and making them easier to push around the heater. The gasses that finally exit are then simply made up from steam and carbon dioxide.

The main magical act that makes a rocket mass heater super special, and the main working of the rocket mass heater that we should be in awe of, is found within the heat riser. Here this open ended combustion chamber, coupled with a strong convective current, ensures that the smoke never gets sucked upwards and instead the air is continuously sucked in from the wood filled hole, meaning that no smoke escapes at all. In fact, it’s so hot within this top region that most of the smoke gets burned up!

How to build a rocket mass heater

2 Rocket mass heater plans from the tried, tested and completely trusted experts

Bonny rocket mass heaterThe ‘Bonny Convection Bench’ rocket mass heater

The first  tutorial is based upon one of the most popularly referred to designs for rocket mass heaters there are. Constructed by Ernie and Erica Wisner, this is a roadmap that has been carefully put together by two engineering veterans (who reassuringly have over 700 rocket mass heater builds under their belt).

Here’s the link for the ‘Bonny Convection Bench’ rocket mass heater professional build plans. It currently cost $25 but they are professional quality build plans that could save you $1000s

Rocket Mass Heater Annex6‘RocketMassHeater-Annex6’ rocket mass heater

Need a pretty large rocket mass heater for your home? Well, the second tutorial below are for a heater that’s more than capable of heating a 3 storey, multi-level family home, even in cooler regions such as right by the coast. The reinforcement within the plans along with the in-built air flow channels ensure that any flooring, hardwood or otherwise, is completely protected whilst providing for effective circulation that heats the whole house.

Here’s the link for the ‘RocketMassHeater-Annex6’ rocket mass heater professional build plans. It currently cost $25 but they are professional quality build plans that could save you $1000s

If you need an adapted plan to fit within your cabin then here it is. This design maps out an eight inch diameter rocket mass heater which takes up just 3.5 foot by 9 foot on the floor.

Rocket mass heaters versus the traditional wooden stove

There may be many readers out there who are avid fans of the conventional wooden stove, and who may be seriously pessimistic about just what a rocket mass heater may be able to offer them. So this section is dedicated to demonstrating just how a rocket mass heater compares when talking about heating efficiencies between the two.

“They say that a current wood stove is 75% efficient… so if the most improvement that can be seen is 25%, and rocket mass heaters can heat the home with a tenth of the wood… isn’t a rocket mass heater then 750% efficient? And why wouldn’t 100% be the maximum efficiency rate at which you can operate?”

The statement above sets out both a confusing landscape as well as a few common misunderstandings. And there are two ways in which this conundrum can be answered.

First, you should measure the temperature and volume of smoke that leaves your traditional wood stove (in short, it’s both extremely hot and of a large amount) and compare this to the exhaust found within a rocket mass heater (where there is a trickle of output that has a temperature of a little more than room temperature). This shows that there is far more heat that is retained by the rocket mass heater than by the conventional stove.

Second, we should look at the figures. Being 75% efficient does not consider the heat that escapes up through the chimney in smoke form. If we were to test a conventional oven within the lab we’d find that between 14% and 16% of the heat were escaping in smoke form alone. So then the 75% rating then becomes 64%. The higher rating is simply marketing spiel helping the big stove companies in their quarterly figures.

Lastly, we must consider that this original 75% may not be all that it seems in any event. This is a rating that was found within a laboratory with experts who were focused on getting the very best rating (and therefore skewing the results). So even though a wood stove may be able to achieve 75% when in ideal laboratory settings with a bunch of experts, the rating that you’ll receive within your home is likely to be far less. In fact it’s been found that on average the operating efficacy of a conventional wood burning stove tends to level off at around 35%, which becomes ever less efficient for those who are opting to burn damp leaves (where efficiency can run at something like 5%!). Now in comparison we take rocket mass heaters, which have no way of losing their inner air flow, and thus never lead to a slow, inefficient burn.

If you liked this post, but you’d like something a bit simpler to build first, why not check out our DIY rocket stove post?

(Images from: Wikipedia & Ernie and Erica Wisner)

Filed Under: A.K.W.N, DIY, General, Homesteading, Self-Sufficiency

The Ultimate Tomato Growing Post — A Round-Up Of Experts’ Growing Tips

The Ultimate Tomato Growing Tips

This post is a round-up of smaller posts that were previously featured on Knowledge Weighs Nothing. (I am slowly going back through KWN and tidying things up and removing lots of old/dead posts etc). I have compiled several older tomato growing/preserving posts here in one place to make it simpler to find these excellent tomato growing and preserving tips and tricks. Take your tomato growing to the next level!

DIY Self Watering Alaska Grow Buckets

The Alaska Grow Bucket is the easiest self-watering container system that anyone can use to grow their own food. Alaska Grow Buckets use capillary action of a soil-less grow-medium to draw water from below up to the plant roots. The good thing about this design is there is no pumps, no electricity and best of all, you grow your own food. Become more self-reliant and build one this summer. Find out more here.

How To Grow 50-80 lbs Of Tomatoes Per Plant

That’s right – 50 – 80 pounds of tomatoes PER PLANT! That’s amazing, you could grow a huge amount of tomatoes in a really small space. This is useful for everyone regardless of how much space they have for growing food, but it is especially useful for people with limited growing space. Watch the video above and see how it’s done.

One Man’s Genius Idea For Growing A Huge Tomato Crop

tomatoesbumper

James over at hometalk.com has come up with an awesome way of growing bumper crops of tomatoes with very little effort. James came up with an innovative way to water and feed the tomatoes using a garbage bin. Not only does it result in huge tomato crops, but it is also a much easier way to grow tomatoes as you only have to water them every 2-3 days.

You could use this method to grow tomatoes outdoors or in a greenhouse (if you plant into the ground in your greenhouse). This method is genius in its simplicity, so head over to Home Talk on the link below and find out more… You could probably grow cucumbers and peppers using the same method too! Read James’s post here.

Combat Tomato Blight With Copper Coins

tomato blight

I refuse to use pesticide, insecticide and anti-fungal spray on my fruit and vegetables. If I want to eat foods containing these, I’ll just get them from the supermarket…

The problem is – my reluctance to use chemicals has cost me my entire tomato crop for the last two years! I also lost most of my potatoes last year as well. I lost both crops due to blight.  Most people don’t realize, but potato blight and tomato blight are exactly the same. The blight is the same fungus called: Phytophthora infestans.

Many people think that the coin/blight trick is a myth; I can tell you it is not. It works, but only if you use coins produced before 1982 as these have more copper in them and it is the copper that stops the blight. The copper/coin tip might not completely stop the blight, but it may slow it down long enough for your affected tomatoes to ripen. Read the post in full here.

Homemade Monster Tomato Fertilizer Recipe

Do you want to use natural fertilizer on your plants and vegetables? I know I do. I found a great article showing you the recipe for “monster tomato fertilizer” I know I will be trying this. It’s really simple to make and all-natural.I’m thinking about using this recipe on my flowers too, see if I can win any competitions. Find out more here.

How To Correctly Plant Tomato Plants To Get 8 Foot Plants

tomatoplant

I think it is fair to say that if you garden and grow your own food, you grow tomatoes. Problem is – if you’re like me, your tomatoes don’t always do as well as expected. Some years we have amazing crops of tomatoes and don’t know what to do with them all but last year, for example, we got hit badly by tomato/potato blight and we lost 90% of our crop.

Now whilst there isn’t a great deal you can do if it is a bad year for blight, there are things you can do when planting your tomato plants which will all but guarantee huge healthy plants with an abundance of fruit. Also, if you follow this method of planting, your tomato plants will be so much stronger and healthier, they may be able to resist the tomato blight fungus that little bit longer that could enable you to harvest the crop before it fails. Check out this link for this awesome tomato planting tutorial from ‘Love Apple Farms’.

How To Build The Ultimate Tomato Or Pepper Cage For Under $2….The Stake-A-Cage

The support of a 4′ long wooden stake – attached to an open-faced wire mesh grid. Strong and durable and cheap! It combines the durability of staking tomatoes with the ease of a cage.

 Better yet, by keeping the wire grid flat and not making a true cage – you can tie your tomatoes easily to the grid – and when it comes time to pick – you won’t have to reach through the cages to get to the goods. Click here to see the full article and see how you can make your own ” Stake A Cage”

Very Quick & Easy Way To Make Homemade Sun-Dried Tomatoes

Sun-dried tomatoes are delicious and they really do bring dishes and snacks alive. I am sure more of us would eat more sun-dried tomatoes if it wasn’t for the fact they cost a fortune at the store. Sure, some of you live in climates where you can actually sundry your tomatoes outdoors in the traditional way, but this method takes quite a bit of effort and takes days to completely dry out the tomatoes.

There is an easier way! You can make sun-dried tomatoes in a food dehydrator or an oven. Wait I hear several people shouting that these aren’t sun-dried tomatoes… Interestingly around 90% of sun-dried tomatoes from the store are not actually dried in the sun! I guarantee you that if you follow this tutorial, you’ll end up with the most delicious sun-dried tomatoes you have ever tried, AND you’ll save an absolute fortune over buying them from the store.

Dehydrating Tomatoes 101

tomatos
Dehydrated tomatoes taste amazing!  The problem is when you grow your own tomatoes the year usually goes like this – nothing, nothing, nothing and then loads of tomatoes in one go!

Tomatoes are so healthy, tasty and versatile it is a crime to ever waste them. Sure you can make sauces etc but I think one of the best ways to preserve tomatoes is to dehydrate them. If you don’t have a dehydrator because you think they are too expensive, then get one of these at just $35. For the price it has amazing reviews…

Here is an awesome tutorial on how to dehydrate tomatoes from Bev Cooks, check it out and the next time you have a glut of tomatoes or they are on offer at the store, get dehydrating!

(Original Images –Bev Cooks, Wikipedia, Love Apple Farms, Muffet, TheWalden Effect, Home Talk, LDSPrepper, oldworldgardenfarms.com, chateau-listeur.blogspot.ca)

Filed Under: A.K.W.N, Growing your Own, Homesteading, Self-Sufficiency

How To Make Your Own Charcoal At Home — So Easy & Simple!

Homemade charcoal

For most of us, charcoal means one thing – summer barbecues! However, charcoal can also be used for cooking outdoors year-round. It is also a great option to store for cooking during emergency, SHTF scenarios. Additionally, good quality homemade charcoal can also be used to make effective DIY water filters. Charcoal can also be used to treat poisoning when consumed in small quantities (make sure you know what you are doing!).

Charcoal isn’t all that expensive to purchase, but if you have some hardwood, you can easily make your own charcoal for free. It could be especially useful to make and store for an SHTF, grid-down scenario, where charcoal could be used for cooking, heating and bartering etc.  If nothing else though it is actually very, very satisfying to make your own charcoal.

Watch the video below by Mike Pepler to see just how easy it is to make your own charcoal in your backyard. Mike covers making charcoal using a small steel drum placed inside a larger oil drum, to create a kiln to cook the wood and make charcoal. This method could be scaled up or down depending on your requirements or the size of drums you have available.

Filed Under: A.K.W.N, DIY, Homesteading, Self-Sufficiency

5 Moonshine Recipes You’ll Be Over-The-Moon About!

Moonshine recipes

So you’re looking for some moonshine recipes? That’s quite understandable as there are few things as enjoyable as creating the perfect moonshine, particularly when you’ve waited for the mash to ripen into something truly delicious. What’s more, with so many moonshine recipes out there, you can be spoilt for choice as to what to create next. With this in mind,  we’ve collated some of our favourite recipes. Happy mashing people!

Important note: Distilling alcohol is illegal in the US unless you have a fuel alcohol or a distilled spirit plant permit. Be sure to review your state/country laws on distilling alcohol.

Moonshine Recipes

Southern Whiskey Moonshine Recipe

This special moonshine has the distinct taste of the south and makes for a real kicker for those looking for something more potent.

Ingredients that you’ll need

  • ¼ of Corn syrup (per 1 1/2 gallons of water)
  • Water
  • One cup of honey (per every ten gallon batch)
  • 1 – 3 ozs yeast (per ten gallons of mash)

Equipment that you’ll need

  • Sauce pan
  • Hydrometer
  • Food safe fermentation bucket

Southern Whiskey moonshine: Step by step

Step One – Add between 1 and 3 ounces of yeast for every ten gallon batch

Step Two – Heat up around a quarter of your water and then stir in the corn syrup, followed by the honey

You’re aiming for heat of between 120 and 130 degrees (a temperature which will melt your corn syrup).

Step Three – Pour the mixture into the fermenter and finish with cool water, until it reaches 80 degrees.

Step Four – Take a hydrometer reading

To give you an idea about this, you should have had a reading of about 60 to 65, and you shouldn’t exceed a reading of 70.

Step Five – Add in your yeast (being sure to read the instructions on the packet)

Step Six – Leave for between 6 and 14 days for fermentation to take place – then you’re ready to serve.

How To Make Apple Pie Moonshine Recipe Infographic

Apple Pie Moonshine Infographic

How To Make Apple Pie Moonshine Recipe

This recipe has to be one of the most popular around and there are all sorts of variations on it; however, this seems to be one of the most common moonshine recipes (although you’re free to experiment as you wish with the various flavours).

Oh, and did we mention that this particular recipe is ready within 1 hour and 10 minutes? Making it perfect for those who get a little impatient awaiting fruit fermentation.

Ingredients that you’ll need

  • 2 Cups of white sugar
  • 2 Cups of brown sugar
  • 1 Gallon of apple juice
  • 4 Cinnamon sticks, or more to taste
  • 1 Pinch apple pie spice
  • 1 (750 ml) bottle 190 proof grain alcohol
  • 1 Gallon apple cider
  • 1 (750 ml) bottle vodka

Equipment that you’ll need

  • Large pot for the stove
  • Glass jars

Apple Pie moonshine: Step by step

Step One – Mix together the apple juice, apple cider, white sugar, brown sugar, and cinnamon sticks, placing them all into a large pot upon the stove. You should bring this almost to boiling point.

Then, cover the pot with a lid and allow the mixture to simmer  for approximately 1 hour before removing it from the stove and leaving it to cooling completely down.

Step Two – Add the grain alcohol and vodka syrup to the mix and stir. At this point you can also remove the cinnamon sticks.

Step Three- Serve up!

That’s all there is to it, you can now serve this up into glass jars or bottles and enjoy the fruits of your labour!

Store in the refrigerator until you’re ready to drink it. I think apple pie is the king of all moonshine recipes, but that’s my personal preference!

Black bear's moonshine recipeThe best image I could find to represent the Black Beard’s moonshine recipe…

How To Make Black Beard’s Rum Moonshine Recipe

This is one of the best moonshine recipes for the rum lovers, although you do need to be a little patient with it as it can take up to 14 days to ferment.

Ingredients that you’ll need

  • 2 Pounds of brown sugar (for each gallon of water)
  • 1 Cup of honey (for every ten gallon batch of the mixture)
  • Water
  • 1 – 3 ozs yeast (per ten gallons of match)

Equipment that you’ll need

  • Sauce pan
  • Hydrometer
  • Food safe fermentation bucket

Black Beard’s Rum moonshine: Step by step

Step One – Begin by heating up a quarter of your water to around 120 degrees

At this point it will be hot enough to melt the sugar, so add this in and stir. After the sugar, you can add the honey.

Step Two – Pour the mix into your fermenter

Add cool water, according to the measurements above, to cool the mixture to 80 degrees.

Step Three – Take a hydrometer reading and adjust if necessary

To give you an idea about this you should have had a reading of about 90, and you shouldn’t exceed a reading of 100.

Step Four – Add your yeast into the mix as per the packet instructions

Step Five – Leave for between 6 and 14 days to ferment, then serve.

Watermelon for the watermelon for one of the moonshine recipesWatermelon-peach moonshine brandy – oh yeah!

How To Make Watermelon-Peach Moonshine Brandy Recipe

Coming in at a five week fermentation time, this moonshine recipe is the longest of the moonshine recipes listed here. However, with the sweetness of a watermelon, the bitterness of the lime, and an alcohol punch to finish, this is one moonshine recipe that is well worth waiting for.

Ingredients that you’ll need

  • 1 ¼ of a large watermelon
  • 1 ¼ Cup chopped golden raisins
  • 15 limes (you’ll need these to be juiced as we aren’t using the pulp or the zest)
  • 25 Cups of sugar
  • Water (to make 5 gallons)
  • Either wine or distillers yeast
  • 10 peaches

Equipment that you’ll need

  • Sauce pan
  • Hydrometer
  • Food safe fermentation bucket
  • Large bowl

Watermelon-peach moonshine brandy: Step by step

Step One – Juice the watermelons and peaches

You should save the leftover pulp in a sauce pan.

Step Two – Boil up the pulp with five quarts of water for around 30 minutes

Once boiled, strain off the pulp and then add water to the extracted juice.

Step Three – Cool your mixture down to around lukewarm temperature

You should then add in the water to make up a five gallon mix in total.

Step Four – Add in the remaining ingredients, asides from the yeast, to the fermentation bucket

Cover over the mix  with a cloth and leave to stand for 24 hours.

Step Five – After 24 hours add in the yeast

Step Six – Stir the mixture daily over the course of a week and strain off the raisins

Step Seven – Add a fermenting trap and leave to rest for 4 weeks before serving.

How To Make Rye Whiskey Moonshine Recipe

Ingredients that you’ll need

  • 7 pounds of Rye
  • 2 Pounds of Barley
  • 1 Pound of Malt
  • 6 Gallons of water
  • 1 oz of Yeast
  • 1 gram of ammonium-floride

Equipment that you’ll need

  • Sauce pan
  • Food safe fermentation device
  • Large bowl
  • Pillowcase

 Rye Whiskey moonshine: Step by step

Step One – Heat the water to 70 degrees, then mix in the malt and the grain

Step Two – Stir the mixture, slowly raising the temperature by approximately 5 degrees every 2 minutes, until it reaches 160 degrees

Step Three –Keeping the mixture at 160 degrees, stir it constantly for 2 to 3 hours. This will convert the starch into fermentable sugar and dextrin

Step Four – Filter off the liquid, place it into your fermentation device, and allow it to cool to between 70 and 80 degrees

Step Five – Once the mixture has cooled, add 3 grams of yeast followed by 1 gram of ammonium-floride to prevent secondary fermentation. Stir the liquid for 1 minute, then cover and seal with an airlock.

Step Six – Leave for 5 – 7 days to ferment, then pour in to a container, filtering through a pillowcase to remove any remaining solids.

Strawberries for to make strawberry moonshineYou’re going to need lots of strawberries to make this strawberry moonshine recipe!

How To Make Strawberry Moonshine Recipe

Strawberries are one of the first fruits to ripen during the summer months, so it only seems right that there should be plenty of moonshine recipes made from them. So, here’s a quick and easy moonshine recipe that is deliciously sweet (you’ll need to pay attention to the instructions however, as otherwise you could just end up with one large mushy strawberry mess on your hands!).

Ingredients that you’ll need

  • 1 to 3 pounds of Cane sugar
  • 2 Packets of bread yeast
  • 20 pounds of Strawberries
  • 1.5 pounds of Raisins

Equipment that you’ll need

  • 1 Airlock
  • Cutting Board and knife
  • Blender
  • Funnel
  • Large auto-siphon (this really needs to be a minimum 1/2″ tube)
  • Copper immersion chiller
  • Hotplate
  • Large stock pot
  • Large spoon or paddle
  • 2 Fermentation buckets (obviously these need to be food safe)
  • Mesh strainer
  • Refractometer
  • Thermometer

Strawberry moonshine: Step by step

Step One – Rinse off all of your strawberries.

It’s advisable that you use a high pressure hose for this, as it can knock away wild yeast and bacteria which can otherwise taint the taste of the moonshine.

Step Two – Cut all of the tops off the strawberries and throw them away.

Be careful not to miss any of the leaves as these will make the moonshine taste bitter.

Step Three – Check your strawberry batches carefully for any mouldy or rotten fruit. If you find any, discard them straight away as they could contaminate the mash

Step Four – Use only the strawberries that are ripe and un-ruined.

Place them into a blender and create a puree by lightly blending them together. You should take care not to blend them too much however as you don’t want a consistency that is too thin and difficult to separate.

Step Five – Add in your raisins and blend them until they are within the mixture.

Step Six – Pour your mixture into a sanitized bucket (it makes things a lot easier if you use one with a scale on the side)

Step Seven – Once you’ve mixed all of your strawberries and have a total of 2.5 gallons of puree, you can transfer it over to a stainless steel boil kettle.

Step Eight – Mix in 3 gallons of water, making the mixture up to a total of 5.5 gallons.

Step Nine – Use your brix refractometer

To determine the alcohol content of the mixture, you should take a brix reading. To do this, use a small pipette to suck up some of the mixture, this is then placed on a glass plate on the Brix refractometer. You finally view the reading by looking into the contraption’s sight.

Step Ten – Knowing your ideal alcohol measurements

You should really look towards an 8% reading, going any higher than this can result in moonshine that tastes too yeasty. However as this leads to a relatively low gravity reading (where low is considered as less than 15 brix / 1.061 Gravity) cane sugar will need to be added to sweeten the mix.

Step Eleven – If necessary add the cane sugar

For this amount of mixture a measures of 4 pounds of cane sugar should sweeten the moonshine up.

Step Twelve – Stir the mixture once more and take a brix reading to ensure that the gravity has come down

You should now be aiming for a Brix reading of 14 and a gravity reading of 1.055.

Step Thirteen – Cover over and heat to 160 degrees Fahrenheit

Step Fourteen – Cool the mixture down in an immersion chiller

Step Fifteen – When waiting for the mixture to cool you can begin to make the yeast

Use the instructions on your yeast packet for guidance

Step Sixteen – Once cooled to 70 degree Fahrenheit move the mix to your fermentation bucket and add the yeast

Step Seventeen – Cover over and add an air lock.

The temperature where your bucket is stored should be around 70 degrees, leaving it for around a week.

Step Eighteen – Siphon off your mix and run it through a strainer

In doing so you can separate the pulp out and throw it away. You should then add only the strained juice to the still, ignoring any settled yeast that may have formed at the bottom of the barrel.

Step Nineteen – Undertake a spirit run

Distil the product from the stripping run, you should use a low heat for this and run the distiller at a slow rate (this should result in the mixture dripping rather flowing). To ensure this goes as it should you should create at minimum 200 ml fore shots cut, and healthy heads and tails cuts, being sure to save only the best part of the middle of the run for the hearts.

Step Twenty – Serve up!

Serve up your moonshine in glasses filled with fresh, chopped strawberries!

(Images from: Dominic Lockyer, Adam Barhan, Harsha K R & Pixabay)

Filed Under: A.K.W.N, Homesteading, Recipes, Self-Sufficiency

This Charger CAN Recharge Disposable Batteries. Learn More. Save Money

Recharge Disposable Batteries

From an early age, I knew it was kind of possible to reuse disposable, single-use batteries; as a kid, we used to leave dead alkaline batteries out in the sunshine for a few hours, and this seemed to recharge them a little bit, so we could get a bit more use out of them… What I didn’t realize is that you can now actually purchase specific battery chargers which are designed to recharge dead single-use alkaline batteries. Now maybe everyone else knew this already, but I certainly didn’t… Either way, I am sure Duracell and Energiser don’t want you to know this.

This means that once you have purchased one of these specific battery chargers, such as the: Maximal Alkaline FC999 Universal Rapid Charger, you then effectively have free batteries for life. Follow the tips below, and you don’t even need to purchase the disposable batteries, to begin with…

FREE Batteries For Life? How?

Our local authority recycles dead batteries, they pick them up with the garbage once a month. If I went out into the neighbourhood that day, I could literally collect 1000s of free alkaline batteries which could then be recharged and reused. Even if your local authority doesn’t provide this service, you could still get all the free batteries you need, by asking friends and family to save their batteries for you. You could also ask local stores and commercial premises if they could save their batteries for you.

Now I am sure there is a lifespan for recharging disposable batteries, so one set isn’t going to last forever. With this in mind, you’ll need to replace the free dead batteries you collect, from time to time. This shouldn’t be an issue, as simply ask friends etc to save all their used, dead batteries for you, and you should effortlessly have a constant supply of used, dead batteries to recharge.

Just to note – the Maximal Alkaline FC999 Universal Rapid Charger doesn’t just charge alkaline batteries, it also charges RAM, Ni-MH, Ni-CD, AA, AAA, C, D, N, and 9V batteries, so it’s got you covered for everything. Additionally, you might also want to purchase a cheap battery tester, to check batteries are dead and check how well they have recharged.

Anyway, as said, this might not be news to some of you, but hopefully, it is useful information and saves some money for people that didn’t know. All our flashlights, remotes and radios etc take batteries; not to mention, if you have young kids, you get through a huge amount of batteries with all their toys and games. If nothing else, it is for more eco-friendly to reuse old batteries, rather than just throwing them in the trash…

NOTE: Obviously exercise caution and use common sense when choosing spent disposable batteries to recharge. Do not attempt to recharge old looking, damaged or leaking batteries.

Filed Under: A.K.W.N, DIY, General Prepping, Homesteading, Self-Sufficiency

Easily Fix Old Drill Batteries — Options For Both NiCad & Li-Ion Batteries

Fix drill batteries

I have an old DEWALT cordless drill.  The battery no longer holds its charge. I contacted DEWALT ages back about a replacement battery but they quoted $85 PLUS P&P… I am sad to say that my trusty old drill has sat unused since. I purchased a new cheaper drill for half the price.

But all is not lost as thanks to the video below, I am now able to breathe life back into my trusty old DWALT drill! I can ‘hot rod’ and repair the battery for less than $20! I just wish I had found out about this sooner as I would have avoided buying a second drill.

If you have an old Ni-Cad battery drill, or any other battery power tool that’s no longer charging or holding its charge, DON’T pay top dollar for a replacement battery or a new tool. Hot-rod the battery pack and replace the battery cells. It’s pretty straightforward to do. Watch the video below for more information.

I have added a second video down below. This one shows how to upgrade your old NiCad battery drills etc, to lithium battery drills! This means you don’t need to purchase a new drill, to take advantage of the newer, much-improved lithium battery technology. You can simply upgrade your old drill’s battery by replacing the battery cells in it.

I have now found and added a third video. This video explains how to revive Li-Ion batteries. When this works, it gives the batteries a new lease of life.

Please exercise caution when reviving old batteries or replacing the battery cells etc. Follow the instructions in the videos below. Note any safety precautions and limitations. Play Safe!

How To Hotrod a Cordless Drill Battery (Replace The Battery Cells!)

Upgrade Old NiCad Powertool Batteries To Lithium Batteries

How To Revive Dead Li-Ion Power Tool Batteries

Filed Under: A.K.W.N, Homesteading, Self-Sufficiency

How To Make Your Own PVC Water Well Hand Pump

This is a great 9 part series of videos on how to make your own water well hand pump from readily available PVC plumbing parts.

If the SHTF and you need water this could be a very handy skill to know or a very handy bit of kit to have laying around. Additionally, you can never have too many common PVC plumbing pipes and common accessories stored at home.  They can be useful for so many other things which they were never intended for, such as:

  • How And Where To Drill A Well On Your Land
  • Make A DIY Survival Fishing Kit & Then Use It To Catch Fish!
(Photo Credit: MeAndMother2)

Filed Under: A.K.W.N, Self-Sufficiency, Tools & Gear, Urban Survival, Water

  • 1
  • 2
  • 3
  • 4
  • Next Page »

Follow Us On Facebook & Pinterest!

 Facebook Pinterest Twitter

Recent Posts

  • How To Get Rid Of Warts With Tea Tree Oil — TESTED & WORKS!
  • Prepper’s Guide To Generators — Read This First, Before Buying A Generator
  • The KWN Ultimate Bug Out Bag List UPDATED For 2021
  • How To Buy Ex-Military & Government Equipment & Vehicles At Very Low Prices
  • Grow Over 300 lbs Potatoes WITHOUT Digging, Watering Or Any Real Effort…

Categories

  • A.K.W.N (192)
  • Books (1)
  • DIY (58)
  • Food & Water (51)
    • Cooking (10)
    • Foraging (4)
    • Growing your Own (17)
    • Hunting & Fishing (3)
    • Recipes (11)
    • Water (3)
  • General (82)
  • General Prepping (59)
  • Health/Fitness (50)
  • Home Remedies (34)
  • Homesteading (94)
  • Natural Pest Control (19)
  • Self-Sufficiency (32)
  • Tools & Gear (15)
  • Urban Survival (18)
  • Wilderness Survival (26)

Copyright © 2021 · Knowledge Weighs Nothing · WordPress · Log in

  • HOME
  • ABOUT US
  • PRIVACY POLICY
  • CONTACT US