Knowledge Weighs Nothing

Preserve/Store Eggs For UpTo 2 Years ** Without Refrigeration **

 How to Preserve Eggs with Lime

Many people think that once you have some chickens, you then have a constant and predictable supply of eggs. Once you have had some chickens for a while, you soon realise this is not always the case. Well not in our experience anyway…

Chickens can be temperamental creatures and many things such as stress, the weather, age and hormones can all put a temporary stop on egg production. We often have periods of a month or so when egg production drops right off. There’s nothing worse than having to buy eggs when you have your own chickens! Conversely, when conditions are right, you can end up with more eggs than you know what to do with! It is not dissimilar to growing seasons when we end up with a glute of fruit and vegetables during the summer and fall, but very little during the winter and spring.

Similar to how we preserve fruit and vegetables during the summer months in preparation for the winter months, we can also preserve our eggs (without freezing or refrigeration) when they are coming thick and fast. Pioneers and homesteaders have been preserving eggs in this manner for well over 100 years. This and similar methods have probably been used much longer in other traditions.

The method for preserving the eggs requires the eggs to be stored in a container filled with lime water (a mixture of calcium hydroxide, hydrated lime, slaked lime or pickling lime and water). Rather than me detailing the method step by step, I decided to share this excellent video tutorial from the amazing YouTube channel PREPSTEADERS, which is just too good not to feature for the purpose of demonstrating this egg preserving method. Be sure to check out the video which is down below.

If you are interested in learning how to store and preserve eggs for up to two years or so, this twenty-minute video tutorial will be twenty minutes extremely well spent!

Filed Under: A.K.W.N, Food & Water, Homesteading

Homemade Bushcraft/Frontier Knife Made From A File/Rasp — No Forge Required – Simple Tools Only

Homemade Knife

Mora Knives aside, it can be difficult to find an affordable, quality bushcraft type survival knife. Mora knives are very cheap and very highly regarded, but they are not full-tang knives, which means the blade steel does not travel through to the end of the handle. A full-tang knife is always preferable as it is much stronger, and even if the handle breaks, the remaining steel shaft can be wound with paracord or replaced. If the knife is not full-tang and the handle breaks, the knife is all but useless.

So what’s the answer? Well, you can try your luck with cheap full-tang knives, or you can easily make your own bespoke full-tang bushcraft knife from a metal file. The excellent video tutorial below from Outdoor Boys YouTube channel (I highly recommend subscribing! They put out some amazing video tutorials) shows how to make a homemade full-tang, high-quality knife from an old file/rasp. The best thing about this knife making tutorial is the minimum tools/equipment required — literally all you need is a bench vice, a hand grinder, a drill, and a belt-sander. You can even do away with the belt-sander if you don’t have one! There are a couple of clamps used to fit the handle, but at a push, you could easily just use the bench vice for this.

Tools aside, the other great thing about this knife/tutorial is that you do not need a forge to make this knife! That’s right, no forge, you heard me right. If you do a bit of DIY, you likely have everything you need already! This would make an awesome weekend project, check out the tutorial below. The tutorial also covers making the sheath.

One thing that came to mind when watching this tutorial – you could easily skip making the beautiful, but the time-consuming wood handle. Instead, you could make a simple paracord-wrap handle. This would save time and also allow you to always carry a length of paracord with you.

Filed Under: A.K.W.N, DIY, General, General Prepping, Homesteading

The Ultimate Tomato Growing Post — A Round-Up Of Experts’ Growing Tips

The Ultimate Tomato Growing Tips

This post is a round-up of smaller posts that were previously featured on Knowledge Weighs Nothing. (I am slowly going back through KWN and tidying things up and removing lots of old/dead posts etc). I have compiled several older tomato growing/preserving posts here in one place to make it simpler to find these excellent tomato growing and preserving tips and tricks. Take your tomato growing to the next level!

DIY Self Watering Alaska Grow Buckets

The Alaska Grow Bucket is the easiest self-watering container system that anyone can use to grow their own food. Alaska Grow Buckets use capillary action of a soil-less grow-medium to draw water from below up to the plant roots. The good thing about this design is there is no pumps, no electricity and best of all, you grow your own food. Become more self-reliant and build one this summer. Find out more here.

How To Grow 50-80 lbs Of Tomatoes Per Plant

That’s right – 50 – 80 pounds of tomatoes PER PLANT! That’s amazing, you could grow a huge amount of tomatoes in a really small space. This is useful for everyone regardless of how much space they have for growing food, but it is especially useful for people with limited growing space. Watch the video above and see how it’s done.

One Man’s Genius Idea For Growing A Huge Tomato Crop

tomatoesbumper

James over at hometalk.com has come up with an awesome way of growing bumper crops of tomatoes with very little effort. James came up with an innovative way to water and feed the tomatoes using a garbage bin. Not only does it result in huge tomato crops, but it is also a much easier way to grow tomatoes as you only have to water them every 2-3 days.

You could use this method to grow tomatoes outdoors or in a greenhouse (if you plant into the ground in your greenhouse). This method is genius in its simplicity, so head over to Home Talk on the link below and find out more… You could probably grow cucumbers and peppers using the same method too! Read James’s post here.

Combat Tomato Blight With Copper Coins

tomato blight

I refuse to use pesticide, insecticide and anti-fungal spray on my fruit and vegetables. If I want to eat foods containing these, I’ll just get them from the supermarket…

The problem is – my reluctance to use chemicals has cost me my entire tomato crop for the last two years! I also lost most of my potatoes last year as well. I lost both crops due to blight.  Most people don’t realize, but potato blight and tomato blight are exactly the same. The blight is the same fungus called: Phytophthora infestans.

Many people think that the coin/blight trick is a myth; I can tell you it is not. It works, but only if you use coins produced before 1982 as these have more copper in them and it is the copper that stops the blight. The copper/coin tip might not completely stop the blight, but it may slow it down long enough for your affected tomatoes to ripen. Read the post in full here.

Homemade Monster Tomato Fertilizer Recipe

Do you want to use natural fertilizer on your plants and vegetables? I know I do. I found a great article showing you the recipe for “monster tomato fertilizer” I know I will be trying this. It’s really simple to make and all-natural.I’m thinking about using this recipe on my flowers too, see if I can win any competitions. Find out more here.

How To Correctly Plant Tomato Plants To Get 8 Foot Plants

tomatoplant

I think it is fair to say that if you garden and grow your own food, you grow tomatoes. Problem is – if you’re like me, your tomatoes don’t always do as well as expected. Some years we have amazing crops of tomatoes and don’t know what to do with them all but last year, for example, we got hit badly by tomato/potato blight and we lost 90% of our crop.

Now whilst there isn’t a great deal you can do if it is a bad year for blight, there are things you can do when planting your tomato plants which will all but guarantee huge healthy plants with an abundance of fruit. Also, if you follow this method of planting, your tomato plants will be so much stronger and healthier, they may be able to resist the tomato blight fungus that little bit longer that could enable you to harvest the crop before it fails. Check out this link for this awesome tomato planting tutorial from ‘Love Apple Farms’.

How To Build The Ultimate Tomato Or Pepper Cage For Under $2….The Stake-A-Cage

The support of a 4′ long wooden stake – attached to an open-faced wire mesh grid. Strong and durable and cheap! It combines the durability of staking tomatoes with the ease of a cage.

 Better yet, by keeping the wire grid flat and not making a true cage – you can tie your tomatoes easily to the grid – and when it comes time to pick – you won’t have to reach through the cages to get to the goods. Click here to see the full article and see how you can make your own ” Stake A Cage”

Very Quick & Easy Way To Make Homemade Sun-Dried Tomatoes

Sun-dried tomatoes are delicious and they really do bring dishes and snacks alive. I am sure more of us would eat more sun-dried tomatoes if it wasn’t for the fact they cost a fortune at the store. Sure, some of you live in climates where you can actually sundry your tomatoes outdoors in the traditional way, but this method takes quite a bit of effort and takes days to completely dry out the tomatoes.

There is an easier way! You can make sun-dried tomatoes in a food dehydrator or an oven. Wait I hear several people shouting that these aren’t sun-dried tomatoes… Interestingly around 90% of sun-dried tomatoes from the store are not actually dried in the sun! I guarantee you that if you follow this tutorial, you’ll end up with the most delicious sun-dried tomatoes you have ever tried, AND you’ll save an absolute fortune over buying them from the store.

Dehydrating Tomatoes 101

tomatos
Dehydrated tomatoes taste amazing!  The problem is when you grow your own tomatoes the year usually goes like this – nothing, nothing, nothing and then loads of tomatoes in one go!

Tomatoes are so healthy, tasty and versatile it is a crime to ever waste them. Sure you can make sauces etc but I think one of the best ways to preserve tomatoes is to dehydrate them. If you don’t have a dehydrator because you think they are too expensive, then get one of these at just $35. For the price it has amazing reviews…

Here is an awesome tutorial on how to dehydrate tomatoes from Bev Cooks, check it out and the next time you have a glut of tomatoes or they are on offer at the store, get dehydrating!

(Original Images –Bev Cooks, Wikipedia, Love Apple Farms, Muffet, TheWalden Effect, Home Talk, LDSPrepper, oldworldgardenfarms.com, chateau-listeur.blogspot.ca)

Filed Under: A.K.W.N, Growing your Own, Homesteading, Self-Sufficiency

How To Make A Disinfectant Spray & Antiseptic Wash From Bleach

Disinfectant & Antiseptic Wash From Household Bleach

Used mainly to clean and disinfect toilets and sinks, basic household chlorine bleach is very cheap, easy to obtain and it kills almost all known germs and most viruses, including coronavirus. Basic household bleach (not perfumed or thick bleach etc) can be diluted and used to make a powerful spray/surface disinfectant. It can also be used to make an antiseptic wound wash known as Dakin’s Solution. Below you will find the widely used ratios and ingredients for both solutions.

We have also done a how to make germ and virus-killing homemade disinfectant wipes post. Additionally, if you are looking for hand wash or hand sanitizer, but they also sold out in the shops, check out our simple DIY hand sanitizer post and our dish soap DIY foaming hand wash post.

How To Make A Disinfectant Bleach Solution

Safety

  • Bleach emits toxic fumes. Mix the solution outdoors or in a well-ventilated space.
  • Never mix bleach with ammonia, alcohol, vinegar or other acids as doing this can create toxic gases that can be fatal.
  • Wear rubber gloves and avoid getting bleach on your skin or clothes.

Bleach Disinfectant Recipe

  • Clorox or similar household bleach (Sodium hypochlorite solution 5.25%). Don’t use thick or scented bleach.
  • Tap water
  • A mixing/measuring jug
  • An old thoroughly rinsed out plastic spray bottle

How To Make Bleach Disinfectant Spray

The bleach to water ratio is 1:10.  That’s 1 part bleach for 10 parts water.

Coronavirus:  The CDC state that 5 tablespoons (1/3rd cup) bleach per gallon of water or 4 teaspoons bleach per quart of water is effective against coronavirus.

  • Measure out the amount of water required.
  • Measure out the amount of bleach needed (1:10 ratio based on the amount of water).
  • Add the water and bleach to the mixing jug and carefully mix.
  • Carefully pour the mixed solution into a plastic spray bottle and use to disinfect surfaces as required. Be sure to label the bottle as bleach disinfectant!

There is some debate as to how long this disinfectant solution remains effective as it loses disinfectant power quickly when exposed to heat and sunlight. With this in mind, it seems sensible to make small batches daily and discard any leftover.

How To Make Antiseptic Wound Wash (Dakin’s Solution)

Dakin's Solution recipe infographic

This homemade antiseptic is known as Dakin’s solution (also known as Dakin’s fluid & Carrel–Dakin fluid) and it was developed by an English chemist, Henry Drysdale Dakin and French surgeon, Alexis Carrel, it was first used in the First World War to treat soldier wounds and fight infection. The Dakin’s solution recipe is made up of Clorox or similar chlorine bleach, baking soda and water, that’s it…

Dakin’s Solution Recipe

You will need:

  • Clorox or similar household bleach (Sodium hypochlorite solution 5.25%). Don’t use thick or scented bleach
  • Sodium bicarbonate (baking soda)
  • Tap water
  • Cleaned/sterilized pan with lid, measuring cup and spoon,  jar with a lid.

How To Make Dakin’s Solution

  • Wash your hands
  • Measure out 32 ounces (4 cups) of tap water. Pour into the clean pan.
  • Boil water for 15 minutes with the lid on the pan. Remove from heat.
  • Using the sterile measuring spoon, add ½ teaspoonful of baking soda to the boiled water.
  • You can make the solution in one of four strengths. Measure bleach according to the chart and add to the water also:
    1. For full strength – add 3 oz. bleach or 95 ml.
    2. For 1/2 strength – add 3 tbls. + 1/2 tsp. or 48 ml
    3. For 1/4 strength – add 1 tbls. +2  tsp. or 24 ml.
    4. For 1/8 strength – add 2 1/2 tsp. or 12-14 ml.
  • Pour the solution into the sterile jar and put the lid on.
  • Make sure you clearly label the jar as Dakin’s solution, also including the strength of solution and date of expiry
  • Cover the jar with aluminium foil or store it somewhere dark, to protect it from light.

After opening the jar, throw away the remaining solution after 48 hours. An unopened jar can be stored for around a month if it is not opened, providing it is stored in the dark.

(Clorox image by JeepersMedia)

Filed Under: A.K.W.N, Health/Fitness, Recipes

How To Make Your Own Disinfectant Wipes — Quick, Easy & Cheap!

Homemade Disposable Disinfectant Wipes

Since it has become difficult to buy disinfectant spray and disinfectant wipes in some countries many people are looking online for homemade disinfectant solutions. The problem is many websites and blogs are touting a whole range of homemade, natural, alternative and holistic disinfectant recipes that are simply ineffective. This is bad enough during normal times but during this coronavirus pandemic, it is dangerous.

To be clear – as far as coronavirus is concerned, I would not be relying upon any disinfectant recipes that rely on essential oils (including tea tree), vinegar, lemon juice, vodka, bicarbonate of soda or witch hazel as the main germ/virus killing agent. Stick with bleach, hydrogen peroxide or alcohol, at the correct mixing ratios recommended for killing germs and viruses.

From my own research on the CDC website (see here, here and here), I have found the following products and ratios to be effective for killing germs and viruses, including coronavirus.

  • Bleach — a bleach solution with bleach to water ratio of 1:10 will kill all germs and virus within ten minutes. The CDC state that a ratio 1:48 is effective for coronavirus (4 teaspoons per quart) so using a 1:10 ratio is more than adequate.
  • Hydrogen peroxide — 3% hydrogen peroxide – will kill germs and viruses within ten minutes. The CDC state that commercially available 3% hydrogen peroxide is a stable and effective disinfectant when used on inanimate surfaces.
  • Alcohol — alcohol solutions with at least 70% alcohol – will kill germs and viruses within a minute. The CDC state that 70% alcohol is effective for disinfecting and sanitizing.

Check out my two previous posts: How To Make A Disinfectant Spray From Bleach and How To Make Your Own Hand Emergency Sanitizer

Simple Homemade Disposable Disinfectant Wipes

You will need

  • Kitchen towel/paper towel (try not to use cheap/thin kitchen towel as it will tear easily). To make more durable wipes, try using Jay cloths or other similar semi-disposable cleaning cloths. These could also possibly be cleaned and reused.
  • Bleach
  • Water
  • Kitchen gloves/rubber gloves
  • Mixing jug
  • Baking tray or similar flat-bottomed container
  • A Ziploc or sealable bag

Method

When bleach is diluted with water it starts to break down after 48 hours or so. With this in mind, I recommend making a small batch of disinfectant wipes every few days.

  • Take the kitchen towel and carefully tear off 20-30 sheets. Stack them tidily one on top of the other in a stack. Place the stack of paper towel in the baking tray.
  • Put on your kitchen gloves.
  • Mix some bleach/water solution at 1:10 ratio in the mixing jug. Around 100ml of water and 10ml of bleach should be sufficient depending on the size/quantity of paper towel.
  • Carefully pour some of the mixed bleach solution over the stack of paper towels (in the baking tray!). You just want enough solution to saturate the paper towel completely, nothing more.
  • Leave to sit for a few minutes to be sure the paper towel is fully saturated.
  • Now place your hand on top of the stack of paper towel and gently press down to squeeze out excess bleach solution into the baking tray. This bit is down to your own judgement. You don’t want the paper towel wipes to be dripping wet, but they obviously need to be wet enough to wipe down surfaces. You can fine-tune this over your first few batches until you find the consistency/moisture level that works best for you.
  • Carefully place your new disinfectant wipes in a Ziploc or similar sealable bag. Keep sealed and use as necessary and dispose of in the bin.

Note — you could also adapt this to use 3% hydrogen peroxide instead of bleach. Hydrogen peroxide breaks down when exposed to light so you will need to store your wipes in a dark-coloured or opaque airtight container.

It’s recommended that you wear kitchen gloves when using these wipes as they are bleach-based. At the very least make sure you rinse your hands after using them…

Filed Under: A.K.W.N, General, Health/Fitness

How To Make A ‘Doctor Approved’ Reusable Face Mask — No Sewing Required!

Homemade Reusable Face Mask

Firstly a disclaimer of sorts… Simple cloth face masks like the ones featured here are NOT worn to protect you from catching coronavirus. They are worn to help protect others from being infected by you when you are in close proximity.

This is important with coronavirus for two reasons. Firstly, coronavirus can infect others for several days before you begin to experience any symptoms. Secondly, many people who catch coronavirus are asymptomatic. This means they get the virus and are capable of infecting others, but they experience no symptoms themselves. These two points are precisely why coronavirus is so successful at spreading and infecting lots of people…

These cloth face masks work by covering your mouth and nose and catching and reducing the number of droplets you cough, sneeze and breathe out. This reduces the number of virus particles emitted. This has two benefits — fewer emitted virus particles means there’s less chance of passing on the infection to those around you. Also, even if you do pass on the infection, their viral load (the amount of virus passed on) will likely be lower, which could mean the infected person gets a milder illness.

If lots of people wear simple face coverings (buffs and scarfs etc) or cloth masks when in towns and cities and crowded and confined places such as public transport, shops and places of work, this can dramatically reduce the spread of coronavirus in those places.

Note — The only way to completely protect yourself with a mask is if you wear a properly fitted medical, respirator style mask. Even then great care is required when putting on and taking it off to avoid infecting yourself with your hands or surfaces etc.

How To Make N0 Sew Reusable Face Masks

You can purchase simple, reusable face masks on Amazon and eBay etc, but to be honest, they are very simple to make out of an old t-shirt and then they don’t cost a penny either. Watch the videos below to see how it’s done.

The first video is by Dr Cellini. Dr Cellini is a senior diagnostic & interventional radiology doctor and he has a very popular YouTube channel. He has seen various styles of homemade face masks, but he recommends this particular DIY face mask. In this video, Dr Cellini makes his own face mask whilst following another tutorial from Jan Howell. I have also included Jan’s original video tutorial down below, in case you would rather just follow that tutorial instead.


(Main image from Dr Cellini)

Filed Under: A.K.W.N, General, Health/Fitness

How To Make Foaming Hand Wash With Dish Soap

Dish soap foaming hand wash

It’s the end of March 2020 and most of us are stuck at home trying to slow down the spread of coronavirus. Regardless of the country we live in, we are all getting the same basic information and instructions – stay at home – social distancing – frequent hand washing – disinfect common points of contact in the home (door handles, taps, countertops etc).

The problem with the frequent hand washing is that due to panic buying, most stores have been sold out of soap and liquid hand soap for weeks now… You can still buy dish soap (washing up liquid) in most stores though. You could obviously use a squeeze of dish soap to wash your hands in a pinch, but neat dish soap is very strong. Using it more than a few times is likely to dry out and make your hands very sore.

The good news is — you can make a simple foaming hand wash from diluted dish soap! It is probably not the best thing to be washing your hands with longterm, but if you cannot get any soap or liquid hand wash, it’s a good alternative in the short-term.

**If you need a hand sanitizer for when you are out of the home (work or grocery shopping etc), check out our simple DIY hand sanitizer post.**

How To Make Foaming Hand Wash From Dish Soap

  • You will need an empty foaming hand wash dispenser. Either rinse out an old one or you can purchase foaming pump dispensers from Amazon.
  • Some dish soap (washing up liquid)

Instructions

  • Pour some dish soap into the foaming hand wash dispenser. The amount will vary depending on the size of the dispenser. Usually, around 10% will be about right.
  • Top up with water so that’s approx 90% water and 10% dish soap.
  • Screw the pump top on and shake to mix the water and dish soap.
  • Once mixed depress several times until the foam soap starts to come out.

Note: depending on the size of hand wash dispenser and the dish soap you use, you may need to slightly alter the dish soap to water ratio to get the best foam.

**If you are also struggling to find spray disinfectant in the shops — check out our post on how to make spray disinfectant from household bleach.**

Filed Under: A.K.W.N, General, Health/Fitness

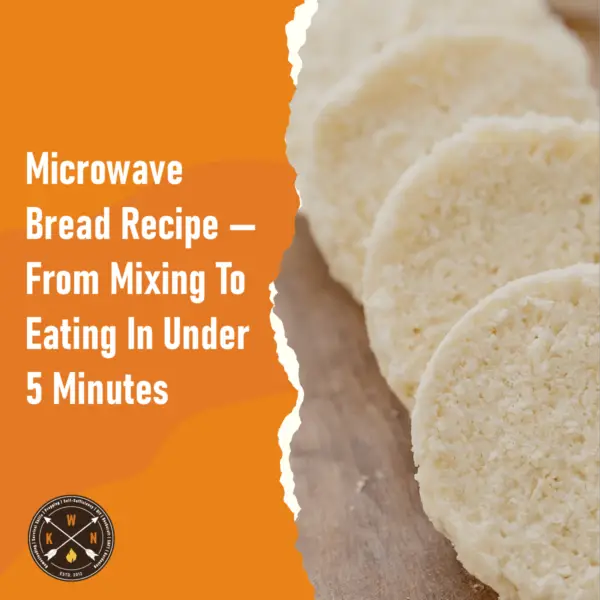
Microwave Bread Recipe — From Mixing To Eating In Under 5 Minutes

Microwave bread recipe

A simple, no-bake, no prove, microwave bread recipe that you can literally make from start to finish in under 5 minutes. It has an approx cook time of 90 seconds.
If you are out of bread and you can’t get any, give this simple microwave bread recipe a go. The end result will not be bread as you know it, but it is passable and useable in the same way as normal bread. You can slice it, toast it and make sandwiches etc.

Homemade Microwave Bread Recipe

This recipe makes approx 1 serving. If you try making any more in one go, it tends to burn before cooking properly. If you need more bread you’ll have to make it in several smaller batches.

  • 40g self-raising flour
  • 1 egg white
  • 25g margarine (alternative try a vegetable oil)
  • A squeeze of lemon juice
  • 1/3 tsp sugar
  • 1/3 tsp baking powder

No eggs? No problem. You can try substituting the egg for either 3 tbsp of juice from a can of chickpeas or a small mashed banana.

Microwave Bread Instructions

  • Get a microwavable glass bowl.  Add the egg and whisk.
  • Now add the lemon juice and baking powder and mix.
  • Add the remaining ingredients to the bowl and mix until smooth and doughy.
  • Place in the microwave and cook on full power for around 90 seconds. You may have to adjust cooking time depending on the power of your microwave.
  • Leave to cool, then slice, toast, enjoy.

Note: This recipe is not an exact science. You may have to experiment with ingredients and cooking times a few times until you get the best results.

Filed Under: A.K.W.N, Cooking

Coronavirus — When You Can, Reach Out & Help Elderly / Vulnerable Neighbours

Coronavirus Help Vulnerable Neighbours

This coronavirus (Covid 19) pandemic will be difficult and worrisome for us all. It is a particularly scary time for the elderly, disabled, and those with living with existing medical conditions.

Similarly to the oxygen mask instructions on aeroplanes (put the mask on yourself first, before trying to put them on your children), in the first instance I think it is important to care for and secure you and yours. Once all reasonable preparations are taken care of, we should all then consider what we can do to help and support the elderly and vulnerable in our street and the local community.

Many old and disabled people experience loneliness and difficulties at the best of times. These are not the best of times. In many countries, people over the age of 70 are, or will soon be asked to self-isolate at home for several months. It seems sensible for people with pre-existing medical conditions to do likewise.

I know you have your own priorities and worries, but once you are sorted and in good shape, please consider reaching out to the elderly and vulnerable in your street and the local community.  It’s not just the elderly or vulnerable living in isolated areas who will struggle, people living bunched together in towns and cities can feel just as isolated and alone.

If you know anyone who might appreciate some help or support during this global pandemic, let them know you are available to help.  Just letting someone know they can call on you if needed could make all the difference…

IMPORTANT — stay away if you are ill. When offering help/support, it is important not to spread the coronavirus to those we are trying to help.

There are many ways you can help without direct contact. For example, swap phone numbers (or email addresses) and talk on the phone rather than in person. Even if you seem well, it is sensible to drop off food/supplies etc by their front door, to keep your distance. They can get it after you have left.

It is vital that you always follow hand washing protocols etc so that you do not pass on the virus on food/supplies you take around.

At all times you want to balance providing support whilst limiting contact as much as possible.

Some Ways To Help The Elderly & Vulnerable

  • Phone and say hello. Tell them to call if they need anything. Phone every few days to keep in touch. Tell them to call even if they just want some company.
  • If you don’t know them personally, talk to them at distance or leave a note (see down below) with your name and phone number. Tell them to phone if they need anything at all.
  • If they are internet savvy — swap email and messaging contacts. Keep in contact online.
  • Offer to help with errands and groceries. Offer to do their shopping and drop it round.
  • Offer to go to the pharmacy to pick up prescriptions etc.
  • Some people cannot afford to spend much on heating and food etc. Check they are staying warm and eating well. Local charities and organisations can help.
  • Offer to walk their dog if appropriate and safe.
  • Help clear snow and ice from around their home.
  • If they become unwell, recommend they seek appropriate medical advice. If required do this for them.

Reach out, connect, show compassion and respect dignity.

Viral Kindness Cards

A lovely woman from the UK, Becky Wass, created these excellent postcards below. You can download and print them out here.

Simply print some out, fill them in and post them through elderly/vulnerable neighbours’ letterboxes. *Be mindful to wash your hands etc before printing and filling in these cards.*

ViralKindness note
DOWNLOAD THE PRINTABLE POSTCARD TEMPLATE

Filed Under: A.K.W.N, General, Health/Fitness

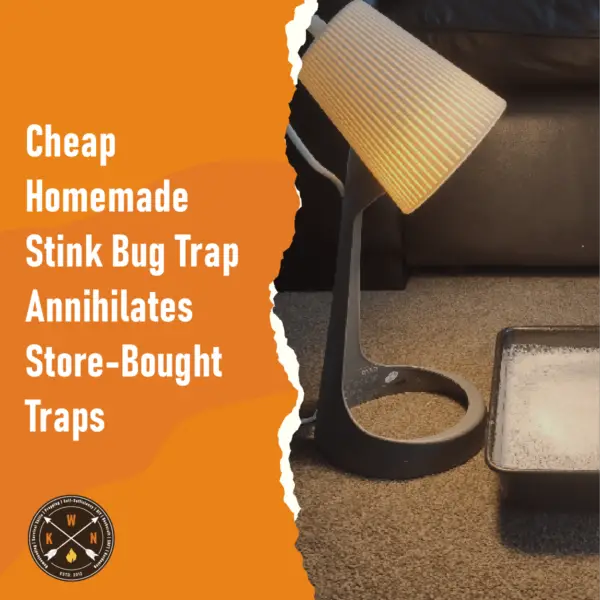
Simple DIY Stink Bug Trap (Works Fast) Build One Today!

How to make a DIY stink bug trap

Stink bug traps are perhaps the easiest and most environmentally-friendly way to deal with these troublesome insects. Although you can purchase pre-made traps, they are usually overly expensive, poorly made, and some are not all that effective.  Luckily, you can easily make a very effective DIY stink bug trap for next to nothing. In fact, you may already have everything you need to make one at home for free!

Below you will find step-by-step instructions on how to make your very own homemade stink bug trap. Additionally, there is an infographic with step-by-step images, and there is also a video tutorial showing how to build your own DIY trap. Further down, we have also included some additional specific information on stink bugs.

(You might also want to check out our ‘how to get keep spiders out of your home‘ post. It contains two techniques for keeping your 100% house spider free!)

How To Make A Stink Bug Trap

Stink Bug Trap Materials

To make a homemade stink bug trap, you’ll need to gather the following items:

1 | A 2-Litre Soda Bottle
2 | Razor Blade or Box Cutter
3 | LED Lights (RECOMMENDED: pack of three LED lights on Amazon for around $7)
4 | Black Electrical Tape
5 | White Masking Tape

Stink Bug Trap | Step-by-Step Instructions

Step One | With the razor blade, cut off the soda bottle just above the label, which is typically 1/3 of the top portion.

Step Two | Wrap the lower portion of the bottle with black electrical tape. This helps focus the light beam for maximum effectiveness.

Step Three | Put the LED light at the bottom of the bottle.

Step Four | Put the freshly removed top portion of the bottle upside down into the bottom portion of the bottle to create a funnel. (See Video for Visual Description)

Step Five | Add 4 strips of masking tape from the bottom to the top of the bottle so the stink bugs have a rough surface to climb. However, do not place the tape on the interior portion of the bottle as you don’t want these critters climbing out of the trap.

Step Six | With a pen or stick, press down on the LED light to turn it on.

Step Seven | Place the stink bug trap in a dark room at night, and in the morning review your collection.

There you have it! This is perhaps the easiest – and most effective – stink bug trap.

How To Make A Stink Bug Trap INFOGRAPHIC

make a sink bug trap infographic


DIY Stink Bug Trap Video Tutorial


Stink Bug Prevention is Better than Elimination

Establishing a stink bug trap is essential to catch bugs that are in your home; however, prevention is a key player in overall elimination. According to many pest experts, exclusion is the most important method to keeping stink bugs at bay. Review your home to look for cracks in doors, windows and siding. Make sure to repair damaged screens on windows or doors and seal all unintended openings with a high-grade silicone caulk.

While many pest control companies recommend using pesticides to help control stink bugs, this is not the wisest choice. Although these chemicals can help deter stink bugs from entering your home, should they already exist, insecticidal products can kill stink bugs but then only provide other pests, such as carpet beetles, with a food source. Therefore, these harmful chemicals not only enhance the likelihood of a secondary infestation, but also cause extreme harm to the environment.

The most effective way to eliminate these pests from your home is through a stink bug trap.

Brown marmorated stink bug image

What Are Stink Bugs?

Regardless of where you live or what your climate is like, there’s an infestation coming your way – stink bugs, or brown marmorated stink bugs to be exact.

These creatures are not only determined to find their way into your home, but as its name suggests, they stink! Let’s take a few moments and learn more about these odorous bugs.

Before building a stink bug trap, it’s important to know what exactly is a stink bug? In the most fundamental sense, stink bugs are a member of the Pentatomidae insect family and feature a large, oval (or shield) shape. Its average length is 17 mm and adults typically feature varying shades of brown on both the lower and upper portions of their body. Due to its shield shape, stink bugs feature nearly the same width as its length.

To identify a stink bug, lighter shades of brown form bands around the antennae while darker shades of brown are location on its membranous, as you look toward the rear of their front wings, these two bands seem to overlap. On the head and pronotum of the stink bug, copper or blue-metallic coloration is typically found.

As you may already be well-aware, its name is derived from the odor produced from its abdomen and along the underside of its thorax. This odor is the result of a chemical reactions scientists believe is a defensive mechanism. Upon first glance, you may not immediately smell its odor; however, should the bug become startled or feel as if it’s in danger, it will release its strong odor, which can quickly fill a room.

Unlike many other insects found throughout the region, scientists are not sure which seasons are “prime” seasons for the stink bug. However, during fall and winter months, stink bugs seem to gravitate toward the warmth of a home. This is evident during nighttime when they are drawn to the heat emitted from lights, computer screens and televisions.

While stink bugs are annoying should they enter your home, they also pose a serious threat to agriculture; both small and large. Stink bugs feed on a wide array of plants; however, they seem to be drawn specifically to fruits, such as peaches, apples, citrus fruits and mulberries. They are also prone to feed on weeds, soybeans, ornamental plants and other human food sources.

Although stink bugs are not a serious threat to humans, some people can develop an allergic reaction to the chemicals found within their odor, which means stink bugs have an aeroallergen tendency. It’s important to note that individuals who crush or smash stink bugs with bare skin may develop an allergic reaction within their skin, because of this, it’s not advised to crush stink bugs, but rather use a stink bug trap. Also, should you crush this stinky creature, its glands produce a vast amount of the odorous chemical, which can be quite unpleasant, to say the least.

Be sure to check out our related post: 6 Mosquito Repellent Plants To Grow

(Image from: Wikipedia & Fyn Kynd Photography)

Filed Under: A.K.W.N, DIY, General, Natural Pest Control

  • « Previous Page
  • 1
  • 2
  • 3
  • 4
  • 5
  • …
  • 20
  • Next Page »

Follow Us On Facebook & Pinterest!

 Facebook Pinterest Twitter

Recent Posts

  • 5 Native American Skills That We Should All Be Learning
  • Little-Known Government Auction Website (You’ve Got To Check This Out!)
  • How To Get Rid Of Warts With Tea Tree Oil — TESTED & WORKS!
  • Prepper’s Guide To Generators — Read This First, Before Buying A Generator
  • The KWN Ultimate Bug Out Bag List UPDATED For 2021

Categories

  • A.K.W.N (194)
  • Books (1)
  • DIY (58)
  • Food & Water (52)
    • Cooking (10)
    • Foraging (4)
    • Growing your Own (18)
    • Hunting & Fishing (4)
    • Recipes (11)
    • Water (3)
  • General (83)
  • General Prepping (61)
  • Health/Fitness (50)
  • Home Remedies (34)
  • Homesteading (95)
  • Natural Pest Control (19)
  • Self-Sufficiency (32)
  • Tools & Gear (16)
  • Uncategorized (1)
  • Urban Survival (18)
  • Wilderness Survival (26)

Copyright © 2021 · Knowledge Weighs Nothing · WordPress · Log in

  • HOME
  • ABOUT US
  • PRIVACY POLICY
  • CONTACT US